
Table of Contents
Introduction: Why Emergency Preparedness Can't Wait

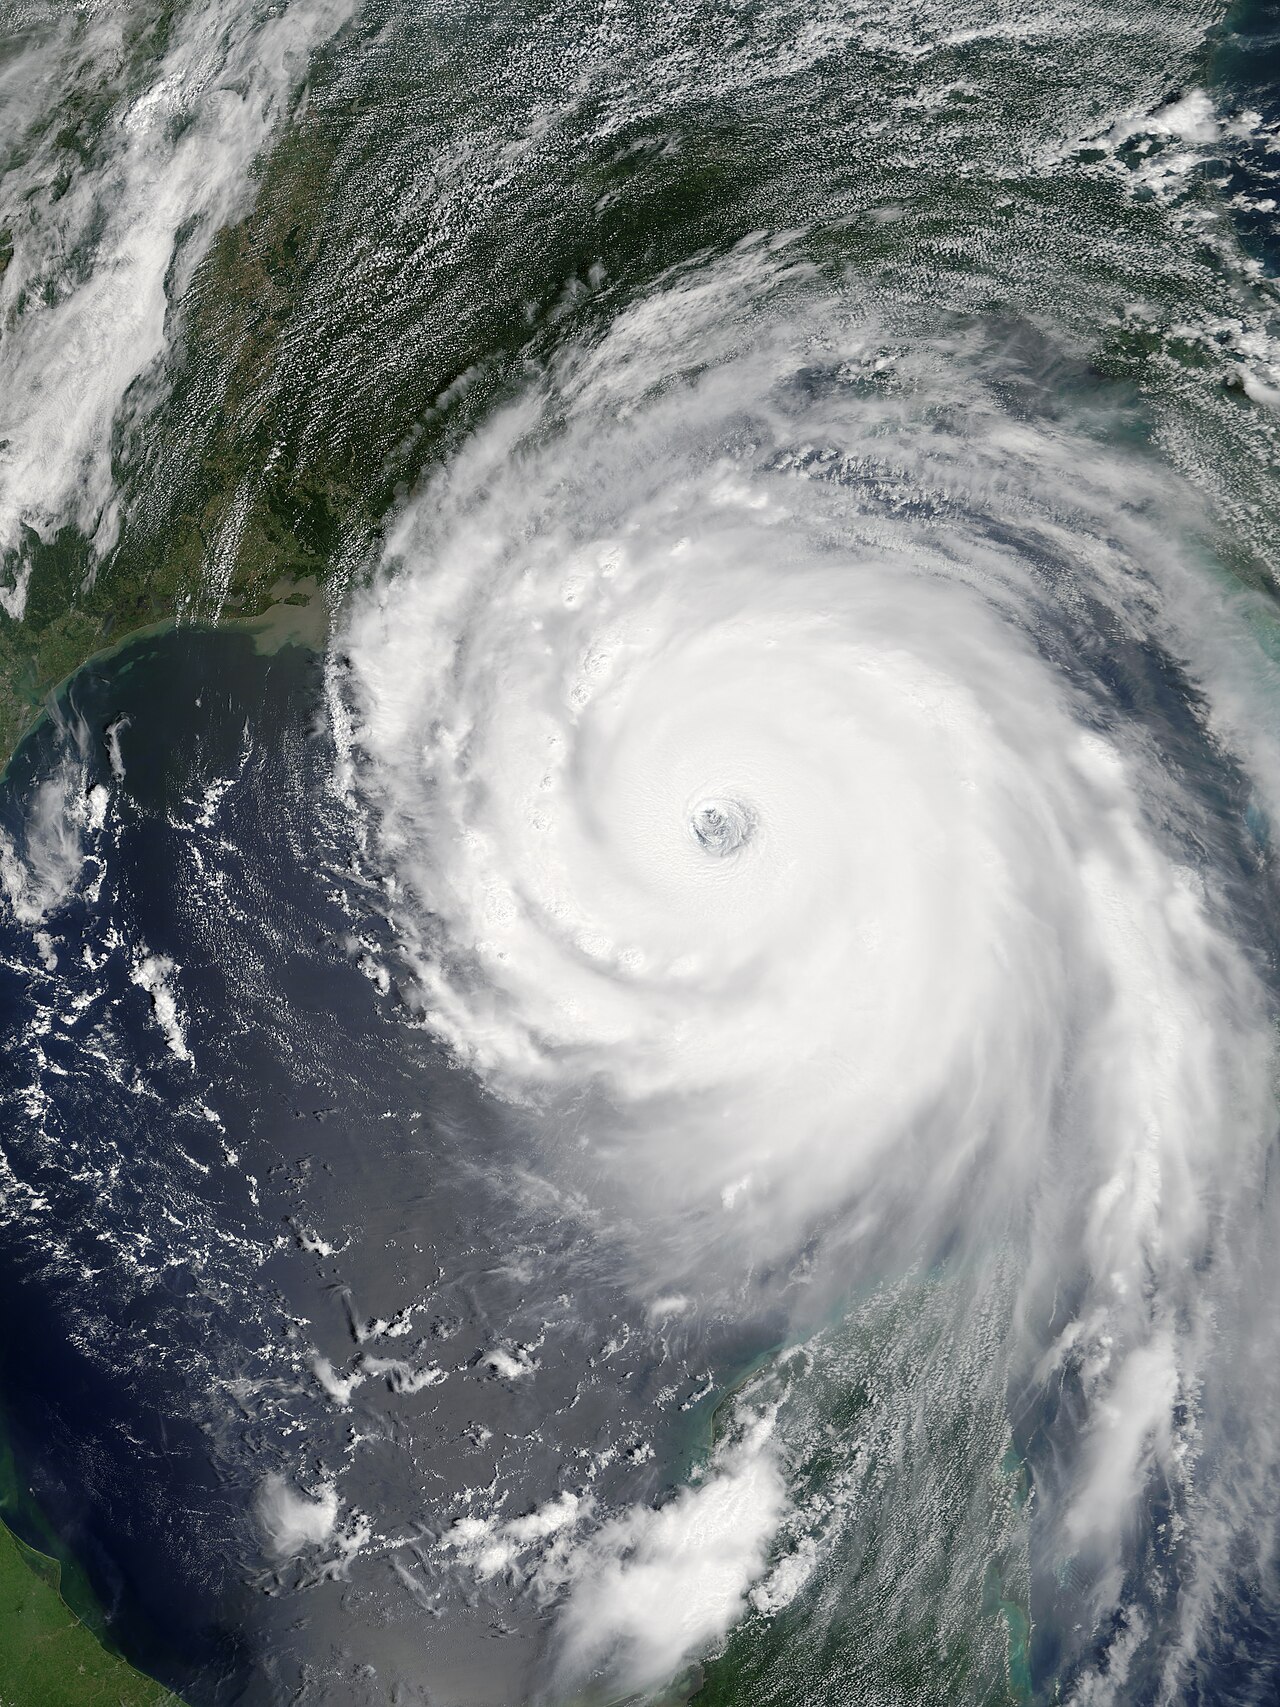
On August 29, 2005, Hurricane Katrina devastated the Gulf Coast, causing over $125 billion in damage and claiming more than 1,800 lives. In 2017, Hurricane Harvey dumped over 60 inches of rain on parts of Texas, flooding over 300,000 structures. The 2018 Camp Fire in California destroyed nearly 19,000 structures in a matter of hours. The 2021 Texas winter storm left millions without power in freezing temperatures, causing hundreds of deaths and billions in damage.
These aren't distant historical events or rare anomalies—they represent our current reality. Natural disasters are increasing in frequency and intensity due to climate change, aging infrastructure, and expanding development in vulnerable areas. The question isn't if an emergency will affect your home and family, but when.
Yet despite this growing risk, most American homeowners remain woefully unprepared. According to FEMA, fewer than 40% of Americans have an emergency preparedness plan, and only about 50% have any emergency supplies beyond basic household items. This lack of preparation costs lives, causes preventable injuries, results in property damage that could have been mitigated, and creates psychological trauma that lasts long after disasters end.
The reality is stark but simple: The time to prepare for emergencies is before they happen, not during or after. When hurricane warnings are issued, store shelves empty within hours. When wildfires approach, evacuation routes become gridlocked. When earthquakes strike, there's no time to gather supplies or make plans. The families who survive disasters with minimal harm are almost always those who prepared in advance.
Emergency preparedness isn't about paranoia or pessimism—it's about responsible homeownership and family protection. Just as you maintain insurance, lock your doors, and service your car, preparing for emergencies is a fundamental responsibility that protects the people and property you care about most.
This comprehensive guide provides everything you need to create, implement, and maintain an effective emergency preparedness plan for your home and family. You'll learn how to assess risks specific to your location, create communication plans ensuring family members can connect during chaos, assemble comprehensive emergency kits sustaining you through disasters, protect your home from preventable damage, plan evacuations, and recover after emergencies pass.
The investment required is modest—a few hundred dollars for supplies and a few hours for planning. The potential return is immeasurable: your family's safety, your home's protection, and your peace of mind knowing you're prepared for whatever emergencies may come. Let's begin building your comprehensive emergency preparedness plan.
Understanding Why Emergency Preparedness Matters

Before diving into the "how" of emergency preparedness, understanding the "why" provides motivation and context for the time and resources you'll invest.
The Growing Threat: Disasters Are Increasing
Natural disasters are becoming more frequent, more severe, and more costly:
Climate-related disasters: According to NOAA, the United States experienced 22 separate billion-dollar weather and climate disasters in 2020 alone, a record. This trend continues as climate change intensifies hurricanes, floods, droughts, and wildfires.
Wildfires: The 2020 wildfire season saw over 10 million acres burned in the western U.S.—an area larger than Maryland and Delaware combined. California's wildfire season now extends nearly year-round rather than just summer months.
Flooding: Flooding represents the most common and costly natural disaster in the U.S., affecting all 50 states. FEMA reports that just one inch of water can cause $25,000+ in damage to a home.
Severe weather: Tornadoes, severe thunderstorms, and winter storms cause billions in annual damage and hundreds of deaths. These events often strike with minimal warning, leaving no time for preparation once they begin.
Earthquakes: While less frequent than other disasters, earthquakes can devastate entire regions in seconds. The "Big One" expected along California's San Andreas fault could affect millions of residents and cause trillions in damage.
Power grid failures: Aging infrastructure, extreme weather, and cyberattacks threaten power systems. The 2021 Texas blackout demonstrated how quickly modern life collapses without electricity.
The Human Cost of Unpreparedness
Statistics reveal the tragic consequences of inadequate preparation:
Preventable deaths: Many disaster fatalities result from poor decisions made during emergencies—failing to evacuate when warned, sheltering inappropriately, or attempting to drive through floodwaters. Prepared individuals make better decisions under stress because they've already thought through scenarios and created plans.
Preventable injuries: Emergency rooms overflow after disasters with injuries that preparation could have prevented—falls from unsecured furniture during earthquakes, carbon monoxide poisoning from improper generator use, dehydration from inadequate water supplies.
Psychological trauma: Beyond physical harm, disasters cause enormous psychological damage. Prepared families experience significantly less trauma because they feel some control over chaotic situations and can focus on safety rather than panic.
Financial devastation: Uninsured losses from disasters often financially ruin families. Homes destroyed without adequate insurance, lost income from extended displacement, and emergency expenses during disasters create financial hardship lasting years.
The Benefits of Preparedness
Conversely, prepared homeowners experience dramatic benefits:
Survival and safety: Prepared families survive disasters that claim unprepared neighbors. The difference often comes down to having supplies, knowing what to do, and making informed decisions rather than panicking.
Reduced property damage: Simple preparations—securing water heaters, clearing gutters, trimming trees, installing hurricane shutters—prevent tens of thousands of dollars in damage during disasters.
Faster recovery: Prepared families recover faster because they have important documents organized, understand insurance procedures, have emergency funds available, and maintained home inventories proving losses.
Peace of mind: Perhaps the most valuable benefit—knowing you're prepared provides tremendous peace of mind. You sleep better during storm season, feel confident in your ability to protect your family, and model responsible behavior for your children.
Community resilience: When more families prepare, entire communities become more resilient. Prepared neighbors can help each other, emergency services aren't overwhelmed with preventable calls, and communities recover faster.
Assessing Potential Risks: Understanding Your Specific Threats
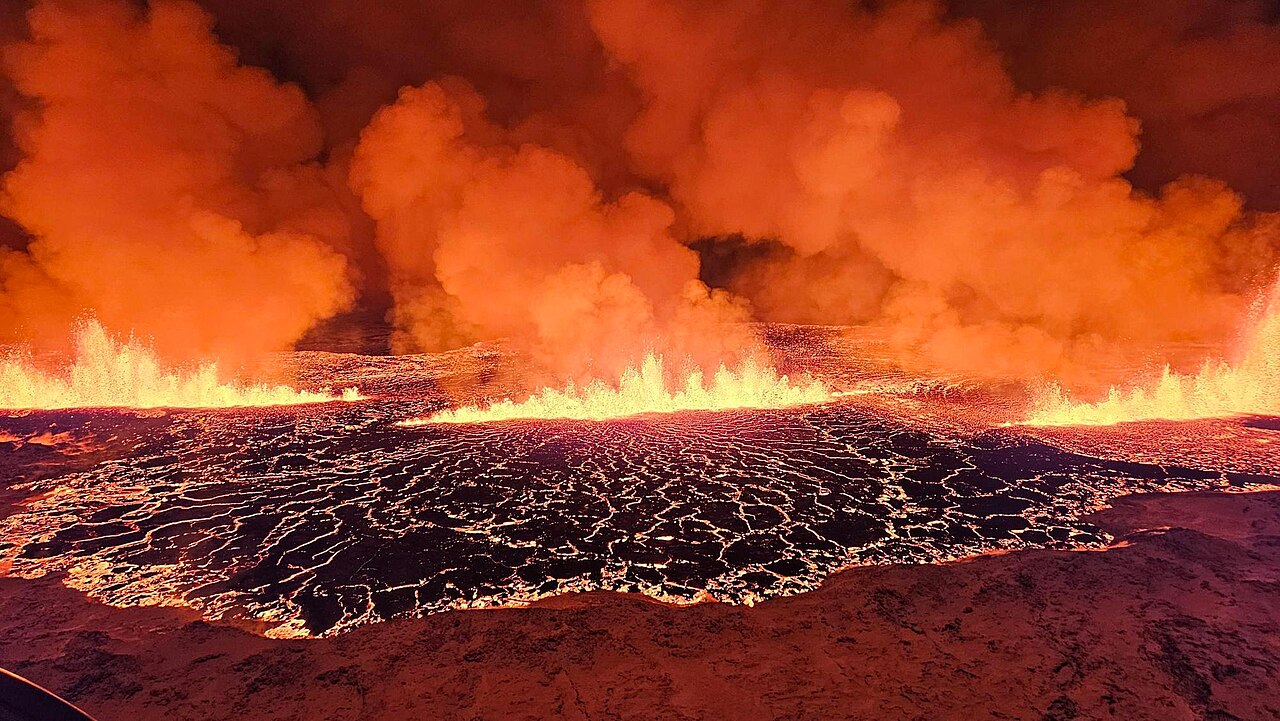
Not all disasters threaten all locations equally. Effective preparedness begins with understanding which emergencies are most likely to affect your specific home and region.
Natural Disaster Risk by Region
The United States divides into distinct disaster risk zones based on geography and climate:
Coastal and Hurricane-Prone Areas
If you live along the Atlantic or Gulf coasts, hurricanes represent your primary natural disaster risk, particularly from June through November.
Hurricane preparedness priorities:
- Structural reinforcement (hurricane straps, impact-resistant windows, reinforced garage doors)
- Evacuation planning (multiple routes, destinations, timing decisions)
- Water and wind protection (shutters, sandbags, roof maintenance)
- Extended power outage preparation (generators, food preservation)
States primarily affected: Florida, Louisiana, Texas, Mississippi, Alabama, Georgia, North Carolina, South Carolina, Virginia, and parts of New York and New England.
Secondary risks: Flooding from storm surge and rainfall, tornadoes spawned by hurricanes, power outages lasting weeks.
Tornado Alley and Severe Weather Zones
If you live in the central United States, tornadoes and severe thunderstorms pose your greatest threats, particularly spring and early summer.
Tornado preparedness priorities:
- Safe room or basement shelter
- Early warning systems (weather radios, smartphone alerts)
- Rapid response plans (can you reach shelter in under 60 seconds?)
- Securing outdoor items that become projectiles
- Helmet availability for head protection
States primarily affected: Oklahoma, Kansas, Nebraska, Texas, South Dakota, Iowa, Missouri, Arkansas, and parts of surrounding states.
Secondary risks: Large hail damaging roofs and vehicles, straight-line winds, flooding from severe thunderstorms.
Earthquake-Prone Regions
If you live along the Pacific Coast, particularly California, or in certain inland areas, earthquakes represent constant background risk.
Earthquake preparedness priorities:
- Structural retrofitting (foundation bolting, cripple wall bracing)
- Securing furniture, appliances, and water heaters
- Flexible utility connections preventing gas leaks
- Drop, cover, and hold-on practice
- Post-earthquake fire and gas leak protocols
Areas primarily affected: California, Oregon, Washington, Alaska, and parts of Nevada, Idaho, Montana, Utah, Missouri, Tennessee, and South Carolina.
Secondary risks: Tsunamis in coastal areas, fires from gas leaks and ruptured power lines, landslides in hilly terrain.
Wildfire-Susceptible Areas
If you live in the western United States, particularly in wildland-urban interface zones where development meets natural vegetation, wildfires pose extreme danger.
Wildfire preparedness priorities:
- Defensible space creation (clearing vegetation 100+ feet from structures)
- Fire-resistant building materials (metal roofs, cement siding, dual-pane windows)
- Evacuation readiness (go-bags, vehicle preparation, evacuation triggers)
- Air quality management during smoke events
- Home hardening against embers
Areas primarily affected: California, Oregon, Washington, Idaho, Montana, Colorado, Arizona, New Mexico, Nevada, and parts of other western states.
Secondary risks: Poor air quality from smoke affecting health, evacuation challenges, post-fire flooding and landslides.
Flood-Prone Areas
If you live in designated flood zones (check FEMA's flood maps), near rivers, in low-lying coastal areas, or even in areas with poor drainage, flooding threatens your home.
Flood preparedness priorities:
- Flood insurance (standard homeowners policies don't cover flooding)
- Sump pumps and backup power
- Elevation of critical utilities and valuables
- Sandbag supplies and deployment knowledge
- Evacuation plans (never drive through floodwaters)
Areas affected: Flood zones exist in all 50 states—flooding isn't just a coastal issue but affects riverside communities, areas with heavy rainfall, and locations with inadequate drainage.
Secondary risks: Water contamination, mold growth, structural damage.
Winter Storm Zones
If you live in northern states or higher elevations, severe winter weather including blizzards, ice storms, and extreme cold pose regular threats.
Winter storm preparedness priorities:
- Heating system reliability and backup heating
- Pipe insulation and freeze prevention
- Snow removal equipment
- Extended periods without leaving home (food, medications)
- Vehicle winter emergency kits
Areas primarily affected: Northern tier states, Great Lakes region, Northeast, higher elevations throughout the country.
Secondary risks: Power outages from ice accumulation, carbon monoxide poisoning from improper heating, hypothermia.
Multi-Hazard Approach
Most locations face multiple types of emergencies. Even if hurricanes represent your primary risk, you might also face tornadoes, flooding, and power outages. Create comprehensive plans addressing all credible threats rather than focusing exclusively on the most likely disaster.
Home-Specific Risks
Beyond regional natural disasters, every home faces property-specific risks:
Age and condition: Older homes with outdated electrical, plumbing, or structural systems face higher risks of fires, floods, and failures during disasters.
Lot characteristics: Homes on slopes face landslide risks, homes under large trees risk damage from falling limbs, homes in low spots flood more easily.
Infrastructure proximity: Proximity to gas pipelines, chemical plants, railroads carrying hazardous materials, or flood control levees creates specific risks requiring planning.
Neighborhood factors: Urban areas face different risks (civil unrest, high-rise fires) than rural areas (wildfire, limited emergency response).
Developing a Family Communication Plan: Staying Connected During Chaos
Communication failures during emergencies cause unnecessary fear, separation, and sometimes tragedy. A comprehensive communication plan ensures family members can coordinate and locate each other regardless of circumstances.
The Challenge of Emergency Communication
Disasters disrupt normal communication systems:
Cell towers fail from damage, power loss, or overload from massive call volumes. During major disasters, cellular networks often become completely unusable.
Internet access disappears when power fails or infrastructure is damaged.
Landlines fail less often than cell service but still suffer outages and require powered phones (most modern cordless phones won't work without electricity).
Family members may be separated—at work, school, errands, or travel—when disasters strike, complicating reunification.
Creating Contact Lists
Develop comprehensive contact lists for all family members including:
Family members: Full names, multiple phone numbers (cell, work, home), email addresses, social media handles
Out-of-area contacts: Designate one or more relatives or friends living in different regions as family communication hubs. During local disasters, long-distance communication often works when local networks don't. Everyone should know to contact the hub person who can relay messages between family members.
Emergency services: Local police (non-emergency), fire department, hospitals, poison control (1-800-222-1222), emergency management offices
Schools and workplaces: Direct numbers for children's schools, daycare facilities, workplaces with extension numbers to reach specific people
Utilities: Electric, gas, water companies for outage reporting and emergency shut-offs
Insurance agents: Homeowners, auto, health insurance with policy numbers
Medical providers: Primary care physicians, specialists, pharmacies
Neighbors and local friends: People who can check on your home or provide assistance
Print these lists on waterproof paper or laminate them, keeping copies in emergency kits, vehicles, workplaces, and children's backpacks. Don't rely solely on phones storing this information—phones die, get lost, or become damaged during disasters.
Establishing Communication Protocols
Create clear protocols everyone understands:
Primary Communication Method
Text messaging often works when calls don't because texts require less bandwidth and automatically resend if initial attempts fail. Establish texting as your primary communication method during emergencies.
Message format: Create a simple message format everyone recognizes:
- "OK - [location]" (I'm safe at this location)
- "HELP - [location] - [situation]" (I need assistance)
- "MOVING - [current location] to [destination]" (I'm relocating)
Check-In Times
Establish specific times when all family members will attempt contact, such as at the top of every hour or every three hours. This prevents constantly trying to communicate (wasting battery and network capacity) while ensuring regular connection attempts.
Out-of-Area Contact Protocol
Everyone should know:
- Call/text the out-of-area contact with your status and location
- The out-of-area contact maintains a status list of all family members
- Family members contact the hub to learn others' status rather than calling each other directly
Example: "Kids, if we get separated during an emergency, text Uncle Mike in Phoenix with where you are and that you're okay. Then text me. If you can't reach me, Uncle Mike will know where you are and can tell you where I am."
Social Media Communication
Facebook, Twitter, and other platforms offer "Safety Check" features allowing you to mark yourself safe during disasters and see which friends/family have done likewise. Teach family members to use these features—they work even when direct messaging doesn't.
Reunion Locations
Designate multiple reunion locations for various scenarios:
In-home location: A specific room (often a basement, bathroom, or interior hallway) where family members gather during tornadoes, earthquakes, or when sheltering in place.
Near-home location: A specific location visible from your home (mailbox, specific tree, neighbor's porch) where family members gather after evacuating the house due to fire or gas leak.
Neighborhood location: A nearby location outside your immediate neighborhood (park, school, shopping center) where you'll meet if the neighborhood is evacuated or inaccessible.
Out-of-area location: A predetermined location in another city where you'll reunite if evacuating from hurricanes, wildfires, or other disasters requiring leaving the area entirely. Choose locations with hotels where you could stay.
Everyone must memorize these locations—don't assume you'll be able to look them up during emergencies.
School and Workplace Plans
Understand how children's schools and family members' workplaces handle emergencies:
School lockdown and release protocols: When will schools release children? To whom? What if you can't pick them up? Schools may hold children for hours during disasters—this is often safest, but you need to know policies.
Workplace evacuation plans: Where do workplaces evacuate to? Do they have communication trees? Will they release employees early during approaching disasters?
Authorize alternate pickup people: Provide schools with lists of authorized adults who can collect children if you can't reach them.
Communication Supplies
Include communication tools in emergency kits:
Battery-powered or hand-crank NOAA weather radio: Receives emergency broadcasts even when other communications fail
Portable phone chargers: Multiple charged battery packs for extending phone use
Car chargers: Vehicle charging cables for all phone types
Two-way radios (walkie-talkies): Useful for family communication within a few miles when cell networks fail—particularly valuable during evacuations or when separated in the same area
Whistle: Loud whistles allow signaling for help when trapped or when communication devices fail
Written plans: Laminated cards with contact information, reunion locations, and protocols
Assembling Comprehensive Emergency Kits: Essential Supplies for Survival

Your emergency kit represents your family's lifeline when disasters strike and normal resources become unavailable. Comprehensive kits sustain you for at least 72 hours—the typical timeline before emergency services can reach all affected residents.
The 72-Hour Rule
Why 72 hours? After major disasters, emergency responders prioritize life-threatening situations—rescuing trapped individuals, extinguishing fires, preventing additional deaths. Distributing food, water, and supplies comes later, often taking 3-5 days to reach all affected areas.
You must be self-sufficient for at least three days, though many preparedness experts recommend supplies lasting 7-14 days for major disasters potentially disrupting supply chains for weeks.
Water: Your Most Critical Resource
Humans survive only 3-4 days without water—making water your absolute highest priority.
Minimum requirement: One gallon per person per day—half for drinking, half for sanitation and cooking. For a family of four, that's 12 gallons for three days, 28 gallons for one week.
Storage solutions:
Commercially bottled water: Longest shelf life (typically 1-2 years), most convenient, but expensive and bulky. Rotate regularly.
Large water containers: Five-gallon jugs or 55-gallon drums provide bulk storage more economically. Add water preservatives and replace annually.
Home water storage: Fill bathtubs (using WaterBOB liners holding 100 gallons) when disasters threaten. Fill every available container with tap water before hurricanes or winter storms when you know outages may occur.
Water purification:
Beyond stored water, include purification methods:
Water purification tablets: Chlorine dioxide or iodine tablets kill bacteria and viruses. Lightweight and shelf-stable.
Water filters: Portable filters like LifeStraw or Sawyer Mini remove bacteria, protozoa, and sediment. Some remove viruses.
Boiling: The most reliable method when you have heat sources—boiling water for one minute (three minutes above 5,000 feet elevation) kills all pathogens.
Bleach: Unscented household bleach (5-6% sodium hypochlorite) can purify water—16 drops per gallon, let stand 30 minutes before drinking.
Food: Sustaining Energy and Morale
Stock non-perishable foods requiring minimal or no cooking and providing adequate calories and nutrition:
Recommended foods:
Canned goods: Vegetables, fruits, beans, soups, stews, chili, meats (tuna, chicken, spam). Choose varieties with pull-tab lids when possible, eliminating can opener needs.
Dried foods: Pasta, rice, beans, oats, cereal, crackers, nuts, trail mix, dried fruits.
Packaged goods: Peanut butter, jelly, granola bars, protein bars, dried fruit, nuts, jerky.
Comfort foods: Candy, cookies, instant coffee, tea bags, hot chocolate—morale matters during disasters, and familiar treats provide psychological comfort.
Baby food and formula: If you have infants, stock at least one week's worth.
Special dietary needs: Account for allergies, medical diets, vegetarian preferences, religious requirements.
Calculate calories: Active adults need 2,000-2,500 calories daily. Children need 1,200-2,000 depending on age. Ensure your stockpile provides adequate calories.
Cooking considerations:
Camp stove with fuel: Propane or butane camping stoves allow cooking when power fails. Store adequate fuel supplies outside your home in well-ventilated areas.
Manual can opener: Multiple manual openers because they break or get lost.
Disposable plates, cups, utensils: Conserve water by avoiding dish washing.
Heavy-duty aluminum foil: Useful for cooking and food storage.
First Aid and Medical Supplies
Comprehensive first aid kits treat common injuries and illnesses until professional medical care is available:
Basic first aid items:
- Adhesive bandages (various sizes)
- Sterile gauze pads and rolls
- Medical tape
- Elastic bandages (ACE wraps)
- Butterfly bandages or wound closure strips
- Antibiotic ointment
- Antiseptic wipes
- Burn gel or aloe vera
- Instant cold packs
- Tweezers and scissors (medical grade)
- Thermometer (non-mercury)
- Disposable gloves (multiple pairs)
- CPR face shield
- First aid manual
Medications:
Prescription medications: At least one week's supply of all prescription medications for family members. Work with doctors and pharmacies to obtain emergency supplies. Rotate regularly as expiration dates approach.
Over-the-counter medications:
- Pain relievers (acetaminophen, ibuprofen, aspirin)
- Anti-diarrheal medication
- Antacids
- Laxatives
- Antihistamines for allergies
- Decongestants
- Cough suppressants
- Anti-nausea medication
- Electrolyte replacement (Pedialyte, electrolyte tablets)
Medical devices and supplies:
- Extra eyeglasses or contact lenses with solution
- Hearing aid batteries
- Medical equipment batteries (CPAP, oxygen concentrators)
- Denture supplies
- Feminine hygiene products
- Personal medications (insulin with cooling supplies if needed)
Lighting and Power
Power outages accompany most disasters—lighting and power sources are essential:
Flashlights: Multiple LED flashlights (one per person minimum) with extra batteries. LED lights provide longer runtime and bulb life than traditional flashlights.
Headlamps: Hands-free lighting for performing tasks in darkness.
Lanterns: Battery or solar-powered lanterns for area lighting. Consider LED camping lanterns.
Glow sticks: Chemical glow sticks provide light without batteries, heat, or fire danger—safe for children and useful for marking locations.
Candles: Emergency candles or survival candles burn for hours, but require fire safety precautions.
Matches and lighters: Waterproof matches in waterproof containers, plus multiple disposable lighters.
Batteries: Large supply of batteries in all sizes you need (AA, AAA, C, D, 9V). Store in cool, dry conditions and rotate regularly.
Portable phone chargers: Multiple battery packs kept fully charged. Solar chargers provide recharging capability during extended outages.
Power banks: High-capacity power banks (20,000+ mAh) can charge phones multiple times.
Car charging cables: Charge devices from vehicles when home power fails.
Tools and Equipment
Basic tools solve problems and prevent injuries during disasters:
Essential tools:
- Multi-tool or Swiss Army knife
- Adjustable wrench (for shutting off utilities)
- Screwdrivers (Phillips and flathead)
- Hammer
- Duct tape (multiple rolls—infinitely useful)
- Plastic sheeting (covering broken windows, creating rain protection)
- Rope or paracord
- Zip ties
- Work gloves
- N95 masks (air quality protection, dust, ash)
- Safety goggles
- Crowbar (for debris removal or forcing entry)
- Shovel
- Axe or hatchet (debris removal, firewood)
Sanitation supplies:
Disasters often disrupt water and sewer systems:
Portable toilet or bucket with toilet seat attachment: For when plumbing fails.
Heavy-duty garbage bags: Many uses including waste disposal, improvised rain gear, food storage.
Toilet paper: Substantial supply.
Moist towelettes or baby wipes: Cleaning when water is unavailable.
Hand sanitizer: Disease prevention when hand washing isn't possible.
Household bleach: Sanitizing surfaces, purifying water.
Feminine hygiene products: Adequate monthly supply.
Soap and shampoo: Personal hygiene maintenance.
Toothbrushes and toothpaste: Dental hygiene prevents infections.
Clothing and Bedding
Appropriate clothing protects against elements and injury:
Change of clothes: Complete outfit including underwear for each person—sturdy, weather-appropriate clothing (long pants, long sleeves, closed-toe shoes).
Rain gear: Ponchos or rain jackets.
Seasonal clothing: Warm layers and hats for cold weather, sun protection for hot weather.
Sturdy shoes or boots: Closed-toe shoes protecting feet from debris, broken glass, nails.
Work gloves: Heavy-duty gloves for debris removal.
Blankets or sleeping bags: Warmth when heating fails. Emergency thermal blankets are lightweight and compact.
Tarps: Shelter, ground cover, rain protection for gear.
Important Documents
Protect critical documents enabling recovery and proving insurance claims:
Document checklist:
- Identification (copies of driver's licenses, passports, social security cards)
- Insurance policies (homeowners, flood, auto, health, life)
- Financial records (bank account numbers, credit card information)
- Medical records and prescription information
- Proof of residence (mortgage/lease documents, utility bills)
- Birth certificates and marriage certificates
- Wills and powers of attorney
- Pet vaccination records
- Home inventory with photos or video of possessions
- Vehicle titles and registrations
Storage: Place copies in waterproof and fireproof containers or bags. Store digital copies on USB drives or in cloud storage accessible from anywhere.
Cash and Valuables
Electronic payment systems fail during power outages:
Cash: Keep several hundred dollars in small bills ($1, $5, $10, $20) for purchasing supplies or gas when credit cards don't work.
Coins: Useful for vending machines and parking meters.
Valuables: Irreplaceable family heirlooms, jewelry, or important items should be easily accessible for evacuation.
Entertainment and Comfort Items
Morale matters during extended emergencies:
Books or magazines: Entertainment without batteries.
Playing cards or games: Family entertainment.
Children's items: Toys, books, comfort items reducing stress and fear.
Writing materials: Notebook and pens for record-keeping and communication.
Photos: Family photos providing comfort and normalcy.
Pet Supplies
Pets depend entirely on you during emergencies:
Food and water: At least one week's supply of pet food and water.
Medications: Pet prescription medications.
Carriers or leashes: Secure transport and control.
Vaccination records: Required by most shelters and boarding facilities.
Comfort items: Favorite toys or blankets.
Litter and litter box: For cats.
Muzzle: Even friendly dogs may bite when stressed or injured.
Kit Organization and Maintenance
Properly organized kits remain useful when you need them:
Containers: Store supplies in large, durable containers with wheels (allowing easy transport). Clear containers show contents without opening. Waterproof containers protect contents from flooding.
Multiple locations: Keep primary kit at home in an accessible location (not attics or basements prone to becoming inaccessible). Maintain smaller kits in vehicles and at workplaces.
Inventory lists: Create and maintain lists of kit contents with expiration dates.
Regular rotation: Every six months, check supplies:
- Test flashlights and radios
- Replace expired food, water, medications, batteries
- Update documents
- Replace seasonal clothing
- Recharge power banks
- Update contact lists
Set reminders on your phone or calendar for these reviews—emergencies don't wait for convenient times.
Safeguarding Your Home: Physical Preparations and Protections

Beyond preparing kits and plans, physically protecting your home prevents damage and creates safer shelter-in-place conditions.
Structural Reinforcements
Simple structural improvements dramatically reduce disaster damage:
Securing Heavy Furniture and Appliances
Earthquakes and hurricanes topple unsecured items, causing injuries and blocking exits:
Anchor furniture to walls: Use furniture straps or L-brackets attaching tall furniture (bookcases, dressers, cabinets, entertainment centers) to wall studs. This prevents tipping during earthquakes or when children climb.
Secure water heaters: Strap water heaters to wall studs using metal strapping at top and bottom. Unrestrained water heaters tip during earthquakes, potentially rupturing gas lines and causing fires.
Install automatic gas shut-off valves: These devices automatically stop gas flow during earthquakes, preventing fires from ruptured gas lines—often the primary cause of post-earthquake destruction.
Secure appliances: Large appliances (refrigerators, stoves, washers, dryers) should be secured to prevent movement.
Anchor overhead items: Secure ceiling fans, heavy light fixtures, and hanging plants that could fall during earthquakes.
Hurricane and Wind Protection
Homes in hurricane zones need specific reinforcements:
Hurricane shutters or impact-resistant windows: Protect windows from flying debris and pressure changes. Shutters can be permanent or deployable before storms. Impact-resistant windows eliminate pre-storm preparation but cost more.
Reinforce garage doors: The largest opening in most homes, garage doors are vulnerable to wind failure that can lead to roof loss. Reinforce with bracing kits or replace with wind-rated doors.
Roof-to-wall connections: Hurricane straps or clips connecting roof trusses to walls prevent roof lift-off during hurricanes. Most older homes lack adequate connections.
Seal penetrations: All openings (vents, pipes, wires) should be properly sealed preventing wind-driven rain intrusion.
Tree maintenance: Remove dead trees and trim branches overhanging your home or power lines. During hurricanes, branches become projectiles causing extensive damage.
Fire Prevention and Protection
Home fires kill more Americans annually than all natural disasters combined:
Smoke detectors: Install smoke detectors in every bedroom, outside sleeping areas, and on every floor including basements. Test monthly and replace batteries annually (or install 10-year sealed-battery models). Replace smoke detectors every 10 years.
Carbon monoxide detectors: Install CO detectors outside sleeping areas and on every floor. Carbon monoxide poisoning kills hundreds annually, especially after disasters when people use generators, camp stoves, or alternative heating improperly.
Fire extinguishers: Place ABC-rated fire extinguishers in the kitchen, garage, and near bedrooms. Learn the PASS method:
- Pull the pin
- Aim at the base of the fire
- Squeeze the handle
- Sweep side to side
Chimney cleaning: Annual professional chimney cleaning prevents creosote fires.
Dryer vent cleaning: Clean dryer vents regularly—lint buildup causes thousands of home fires annually.
Create defensible space (for wildfire-prone areas): Clear vegetation, dead leaves, and flammable materials for 100+ feet around your home. Use fire-resistant plants in landscaping. Keep lawns mowed and irrigated.
Flood Protection
Even minor flooding causes devastating damage:
Elevation: Elevate critical utilities (HVAC units, water heaters, electrical panels) above likely flood levels. Even raising them a few feet helps.
Sump pumps: Install sump pumps in basements with battery backup systems. During floods, power often fails exactly when you need pumps most.
Backflow valves: Install valves in sewer lines preventing sewage backup during flooding—one of the most expensive and disgusting flood damages.
Seal basement walls: Professional basement waterproofing prevents seepage during minor flooding.
Grading: Ensure ground slopes away from your foundation directing water away from your home rather than toward it.
Gutters and downspouts: Clean gutters regularly and extend downspouts at least 10 feet from foundations.
Sandbags: Keep sandbags on hand if you're in flood-prone areas. Properly deployed, they divert water away from homes. Learn proper sandbagging techniques before you need them.
Knowing How to Shut Off Utilities
Knowing how to quickly shut off utilities prevents additional damage after disasters:
Natural gas: Locate your gas meter shut-off valve (usually near the meter where the pipe enters your home). Use an adjustable wrench to turn the valve 90 degrees (perpendicular to the pipe) shutting off gas flow. Only shut off gas if you smell gas, hear hissing, or suspect a leak—turning gas back on requires professional assistance.
Water: Locate your main water shut-off valve (usually near the street or where the main line enters your home). Learn whether it requires turning, pulling, or using a water key. Shut off water if pipes burst or your home floods to minimize damage.
Electricity: Locate your main electrical panel and learn how to shut off the main breaker. Shut off electricity if your home floods (before touching water), if you smell burning, or if you suspect electrical damage.
Tag valves and breakers with instructions and keep necessary tools nearby.
Planning for Evacuation: Leaving Safely When Necessary

Some disasters require evacuating your home. Effective evacuation plans prevent panic and gridlock while ensuring you bring essentials.
When to Evacuate
Understanding when evacuation is necessary versus when sheltering in place is appropriate saves lives:
Mandatory evacuations: When officials issue mandatory evacuation orders, leave immediately. These orders come only when life-threatening conditions are certain or imminent. People who ignore mandatory evacuations risk their lives and endanger first responders who may attempt rescues.
Voluntary evacuations: Officials encourage leaving but don't mandate it. Consider evacuating during voluntary orders if you have young children, elderly family members, medical needs, or pets that complicate sheltering.
Self-initiated evacuations: Even without official orders, evacuate if:
- Wildfires approach your area
- Flooding threatens your home
- Your home becomes unsafe (gas leaks, structural damage, fire)
- You lack adequate supplies or special needs medications
- You feel unsafe remaining
Shelter in place situations: Some emergencies require staying indoors:
- Tornadoes (sheltering in safe rooms or basements)
- Chemical spills or airborne hazards
- Civil unrest in your immediate area
- When evacuation routes are more dangerous than staying
Evacuation Routes and Destinations
Plan multiple evacuation routes because primary routes may be blocked or congested:
Primary route: Your normal, most direct path out of the area.
Secondary routes: Alternative paths using different roads reaching the same general destination.
Tertiary routes: Additional alternatives for when primary and secondary routes fail.
Practice routes: Drive evacuation routes when not under stress. Note landmarks, identify potential bottlenecks, time how long routes take.
Destinations: Identify multiple potential destinations:
Family or friends: Out-of-area family or friends willing to host you temporarily.
Hotels: Research hotels along evacuation routes. Book rooms as early as possible when evacuations seem likely—they fill quickly.
Evacuation shelters: Know where official shelters are located. Understand their rules (most accept pets now, but policies vary). Shelters provide safety but lack privacy and comfort.
How far: Evacuate far enough to be safe. For hurricanes, this might mean 100+ miles inland. For wildfires, it depends on fire location and wind direction. For floods, higher ground outside flood zones.
Evacuation Timing
When you leave matters as much as where you go:
Evacuate early: Don't wait for mandatory orders. Traffic worsens dramatically as evacuations progress. What normally takes 3 hours might take 12+ hours during evacuations.
During Hurricane Harvey, people who evacuated early drove 4-5 hours to safety. Those who waited sat in traffic for 15+ hours, running out of gas on highways. Some turned back and faced the storm in their homes.
Monitor conditions: When disasters threaten, monitor news and weather constantly. Make evacuation decisions based on current forecasts and official guidance rather than hoping conditions improve.
Pre-stage if possible: If you have warning (hurricanes, approaching wildfires), consider evacuating early before orders are issued. You can always return if threats diminish.
Vehicle Preparation
Your vehicle becomes your lifeline during evacuations:
Maintain full gas tanks: When disasters threaten, fill all vehicles' gas tanks. Gas stations experience long lines or run out of fuel during evacuations. Some lose power and can't pump gas.
Mechanical readiness: Maintain vehicles in good condition. Evacuations aren't times to discover your battery is dead or your tires are bald.
Emergency supplies: Maintain vehicle emergency kits containing:
- Water and non-perishable snacks
- First aid kit
- Flashlights and batteries
- Phone chargers
- Basic tools
- Blankets
- Maps (paper maps work when GPS fails)
- Cash for tolls and fuel
Cargo space: Keep cargo areas clear so you can load evacuation supplies quickly.
Packing for Evacuation
Have pre-packed go-bags containing:
- Change of clothes for 3-5 days
- Toiletries and medications
- Important documents
- Electronic devices and chargers
- Cash and credit cards
- Photos and irreplaceable items
- Pet supplies
During actual evacuations, also bring:
- Evacuation kits (a portable version of your home emergency kit)
- Pillows and blankets
- Laptop computers
- Valuable items
- Food coolers if time permits
Loading priority: Load most important items first (people, pets, medications, documents) in case you must leave immediately. Less critical items come next.
Pet Evacuation
Never leave pets behind—they're family members relying on you:
Carriers and leashes: Have appropriate carriers for cats and small pets. Leashes and harnesses for dogs. Transport all pets securely.
Identification: Ensure pets wear collars with current identification tags and are microchipped with current owner information.
Pet-friendly destinations: Research pet-friendly hotels along evacuation routes. Make reservations early—pet-friendly rooms fill first.
Vaccination records: Bring updated vaccination records—many shelters and boarding facilities require them.
Comfort items: Bring familiar toys, beds, or blankets helping pets feel secure during stressful evacuations.
Communication During Evacuation
Let others know you're evacuating:
Family notification: Contact your out-of-area emergency contact with evacuation plans and expected destination.
Social media: Post evacuation status so friends and family know you're safe.
Leave notes: If time permits, leave notes on refrigerators or doors informing authorities you evacuated (helps prevent unnecessary searches).
Staying Informed: Information Sources During Emergencies

Accurate, timely information enables smart decisions during disasters.
Official Information Sources
Rely on official sources rather than social media rumors:
NOAA Weather Radio: All Hazards broadcasts provide continuous weather updates and emergency information from the National Weather Service. Battery-powered or hand-crank weather radios receive these broadcasts even during power outages.
Emergency Alert System (EAS): Broadcasts on TV and radio, EAS provides critical emergency information from local, state, and federal authorities.
Local emergency management: County or city emergency management agencies provide local information through websites, social media, and phone alert systems.
Local news: Established local news stations provide area-specific information. National news covers major disasters but lacks local detail.
Official apps: Many areas offer official emergency apps providing push notifications, shelter locations, and real-time updates.
Weather Monitoring
For weather-related emergencies, monitor conditions actively:
Weather apps: Reliable apps like Weather Underground, The Weather Channel, or local news apps provide forecasts, radar, and warnings.
Radar: Real-time radar shows storm locations, movement, and intensity. Helps you understand whether severe weather is approaching and how quickly.
Warnings vs. watches:
- Watches mean conditions are favorable for severe weather—be alert
- Warnings mean severe weather is occurring or imminent—take action immediately
Know your alerts: Different emergencies have different warning systems (tornado sirens, flash flood warnings, hurricane watches/warnings, wildfire evacuation alerts).
Social Media Caution
Social media can provide useful information but also spreads misinformation:
Benefits: Real-time updates from affected areas, crowd-sourced information about conditions and resources, official agency accounts providing updates.
Dangers: Unverified information, rumors spreading as facts, outdated information recirculating, panic-inducing exaggerations.
Best practices: Follow official sources (government emergency management, National Weather Service, local news), verify information from multiple sources before acting on it, and focus on practical information rather than dramatic stories.
Special Considerations: Planning for Unique Needs
Comprehensive preparedness accounts for household members with special needs.
Children and Infants
Young children need age-appropriate preparation:
Explain emergencies: Use age-appropriate language explaining what disasters are and what your family will do during them. Answer questions honestly without creating excessive fear.
Practice drills: Regular practice reduces fear and builds muscle memory. Make drills educational rather than scary.
Comfort items: Include favorite toys, books, or security items in emergency kits.
Infant supplies: Adequate formula or baby food, diapers, wipes, bottles, and any medical items (medications, thermometer).
Identification: Ensure children carry identification with parent contact information. Teach them how to use phones to call 911 and family contacts.
School plans: Understand school emergency procedures and pickup protocols.
Elderly Family Members
Aging family members may need additional support:
Mobility aids: Include walkers, canes, wheelchairs in evacuation plans. Consider how to transport these items.
Medical equipment: Adequate batteries or backup power for electric wheelchairs, oxygen concentrators, CPAP machines, etc.
Medication management: Extended supply of medications with clear labeling and instructions.
Communication: Ensure elderly family members have working phones and know emergency contacts.
Cognitive considerations: Family members with dementia or Alzheimer's need extra supervision and may wear identification with contact information.
Check-in systems: Regular check-ins with elderly neighbors or family members living alone.
People with Disabilities
Disability-specific preparations ensure safety:
Mobility impairments: Evacuation plans must account for accessibility—can the person navigate stairs? Do they need assistance evacuating? Register with local emergency services for priority assistance during evacuations.
Service animals: Include service animal supplies in kits. Service animals accompany owners in all situations including shelters (unlike pets, which may have separate accommodations).
Hearing impairments: Visual alert systems for emergencies (strobe lights for smoke alarms). Text-based emergency alerts rather than audio-only.
Visual impairments: Tactile markers on emergency supplies. Assistive devices with backup power.
Medical equipment: Extensive backup power solutions and additional supplies.
Personal care attendants: Plans for how attendants will reach you or provide care during emergencies.
Pet and Livestock Emergency Planning
Beyond basic pet supplies, consider:
Pet-friendly shelters: Research options because not all shelters accept pets (though this is changing).
Boarding facilities: Pre-identify boarding facilities outside potential disaster areas willing to take your pets during emergencies.
Rescue alert stickers: Window stickers alerting first responders to pets inside your home.
Pet photos: Keep recent photos of pets helping to identify and recover them if separated.
Livestock: If you have livestock, plans must include:
- Evacuation routes for large animals
- Pre-identified facilities accepting livestock during evacuations
- Supplies and feed for extended periods
- Animal identification (brands, microchips, photos)
Backup Power Solutions: Maintaining Critical Functions
Electricity powers modern life. Extended outages create hardship, risk, and discomfort—backup power systems provide critical protection.
Portable Generators
Gasoline-powered portable generators provide flexible backup power:
Capacity: Size generators to power essential items:
- 3,000-4,000 watts: Refrigerator, lights, phone charging, laptop
- 5,000-7,500 watts: Add TV, microwave, some window AC units
- 8,000-10,000 watts: Add furnace or well pump
Advantages: Portable, relatively affordable ($400-$2,000), can be moved and stored.
Disadvantages: Require manual starting and setup, need fuel storage, are loud, produce carbon monoxide requiring outdoor placement, lack automatic start.
Safety: Never operate generators indoors, in garages, or near windows—carbon monoxide kills. Place generators at least 20 feet from your home with exhaust pointing away from buildings. Use heavy-duty outdoor-rated extension cords.
Fuel: Store adequate fuel (gasoline, propane, or diesel depending on generator type) in approved containers outside your home. Add fuel stabilizer if storing long-term. Rotate fuel supplies regularly.
Standby Generators
Permanently installed standby generators automatically start when power fails:
Capacity: Whole-house systems (15,000-20,000+ watts) power everything. Partial-house systems power critical circuits.
Advantages: Automatic operation, no manual start or setup, quieter than portables, use natural gas or propane from home supplies, professional installation with proper integration.
Disadvantages: Expensive ($4,000-$15,000+ installed), require professional installation and maintenance, permanent installation.
Professional installation includes:
- Transfer switch preventing backfeeding into power grid (dangerous to utility workers)
- Concrete pad or platform
- Electrical connections
- Fuel line connections
- Permits and inspections
Solar and Battery Systems
Solar panels with battery storage provide renewable backup power:
Advantages: No fuel required, quiet operation, renewable energy, can function during extended outages.
Disadvantages: High initial cost ($15,000-$30,000+), limited capacity compared to generators, dependent on adequate sunlight for charging, complex installation.
Ideal for: Those prioritizing sustainability, areas with frequent but short outages, sunny climates.
Power Management
Regardless of backup power type, manage consumption:
Prioritize needs: Power essential items first (refrigerator, medical equipment, water pump). Luxury items (TVs, gaming systems) come last.
Rotate loads: If capacity is limited, rotate power between items—run refrigerator for a few hours, then switch to other needs.
Energy efficiency: LED bulbs, modern appliances, and good insulation reduce power requirements.
Insurance and Financial Preparedness
Financial readiness facilitates recovery after disasters.
Understanding Insurance Coverage
Standard homeowners insurance doesn't cover all disasters:
Homeowners insurance typically covers:
- Fire damage
- Wind damage (except in some coastal areas requiring separate windstorm insurance)
- Theft and vandalism
- Some water damage (burst pipes, not flooding)
Homeowners insurance typically excludes:
- Flooding (requires separate flood insurance)
- Earthquakes (requires separate earthquake insurance)
- Normal maintenance issues
- Mold (sometimes covered if resulting from covered event)
Flood Insurance
Flooding represents the most common and costly natural disaster, yet most homeowners lack flood insurance.
Flood insurance facts:
- Administered through National Flood Insurance Program (NFIP)
- Available to any property owner regardless of flood zone
- 30-day waiting period before coverage begins (buy before disasters threaten)
- Covers building and contents separately (purchase both)
- Relatively affordable in moderate-risk zones ($400-700 annually)
Get flood insurance even if not in high-risk zones—25-30% of flood insurance claims come from moderate- to low-risk areas.
Earthquake Insurance
Standard policies exclude earthquake damage—if you live in seismically active areas, consider earthquake insurance:
Availability: Offered through private insurers or state programs (like California Earthquake Authority).
Cost: More expensive than flood insurance, particularly in high-risk areas ($800-$3,000+ annually).
Deductibles: Typically 10-20% of insured value—on a $300,000 home, you'd pay $30,000-$60,000 before insurance covers anything.
Documenting Your Possessions
Proving losses to insurance requires documentation:
Home inventory: Create comprehensive inventories of possessions:
- Video walkthrough of every room showing contents
- Photos of valuable items with receipts if available
- Written lists with descriptions, approximate values, purchase dates
- Serial numbers for electronics and appliances
Store inventories off-site: Cloud storage, safe deposit boxes, or with out-of-area family.
Update regularly: Add new purchases and remove disposed items.
Appraisals: Have valuable items (jewelry, art, collectibles) professionally appraised with appraisals stored securely.
Emergency Funds
Disasters create immediate expenses before insurance payments arrive:
Recommendation: Maintain emergency funds covering 3-6 months of expenses, but recognize disasters can dramatically increase immediate needs.
Accessible funds: Keep some emergency money in easily accessible forms (savings accounts) rather than all in investment accounts requiring time to liquidate.
Credit access: Maintain credit cards with available credit as emergency backup, but avoid carrying balances.
Post-Disaster Recovery: Rebuilding Your Life
After disasters pass, recovery begins—often taking months or years.
Immediate Post-Disaster Actions
In the hours and days immediately following disasters:
Ensure safety: Don't return home until authorities say it's safe. Check for hazards (gas leaks, structural damage, downed power lines, contaminated water).
Document damage: Photograph and video all damage before cleaning or repairs. This documentation supports insurance claims.
Contact insurance: Report claims immediately. The sooner you start the process, the sooner you receive assistance.
Prevent further damage: Make temporary repairs preventing additional damage (tarping roofs, boarding windows). Save receipts—insurance may reimburse temporary repair costs.
Avoid scams: Unfortunately, con artists target disaster victims. Use only licensed contractors, don't pay large amounts upfront, verify contractor legitimacy before hiring.
Insurance Claims
Filing successful insurance claims requires diligence:
Contact quickly: Report claims immediately but don't rush settlements.
Keep detailed records: Document everything—photos, videos, receipts, written communication, phone call logs.
Understand coverage: Review policies understanding what's covered, deductibles, and limits.
Get multiple estimates: Don't accept the first offer without verification. Hire public adjusters if disputes arise.
Know replacement cost vs. actual cash value: Replacement cost pays to replace items at current prices. Actual cash value deducts depreciation—significantly less money.
Appeal if necessary: If claim denials or offers seem inadequate, appeal through formal processes or hire attorneys.
Emotional Recovery
Disasters create significant psychological impacts:
Acknowledge trauma: Disaster experiences are traumatic. Recognizing and accepting this is the first step toward healing.
Seek support: Therapists, support groups, religious communities, and family/friends provide essential support.
Children's needs: Children process disasters differently. Watch for signs of trauma (nightmares, regression, anxiety, behavior changes) and seek professional help if needed.
PTSD awareness: Post-Traumatic Stress Disorder can develop after disasters. Symptoms include flashbacks, avoidance, hypervigilance, and mood changes. Professional treatment is effective.
Disaster relief organizations: Red Cross, FEMA, and local organizations provide emotional support resources and counseling referrals.
Community Recovery
Communities recover together:
Volunteer: Helping others aids your own recovery by providing purpose and connection.
Support local businesses: Local businesses are vital to community recovery. Shopping locally accelerates economic recovery.
Attend community meetings: Stay informed about recovery efforts and contribute to planning.
Build back better: Use recovery as opportunity to address vulnerabilities—reinforcing structures, improving drainage, creating community shelters.
Maintaining Your Preparedness Plan
Emergency preparedness isn't one-and-done—ongoing maintenance keeps plans effective.
Regular Reviews and Updates
Schedule regular plan reviews:
Every six months: Review and update emergency kits, test equipment, replace expired items, update contact lists, review family plans.
After major life changes: New family members, moving, new jobs, new schools, health changes all require plan updates.
After disasters: Even if not directly affected, disasters reveal lessons worth incorporating.
Annual training: Annual refresher training for all family members on procedures, locations, and responsibilities.
Drills and Practice
Practice makes perfect—regular drills ensure everyone knows what to do**:
Fire drills: Practice home fire drills twice yearly. Practice different scenarios (nighttime fires, blocked exits). Time evacuations ensuring everyone can exit within 2-3 minutes.
Severe weather drills: Practice moving to safe rooms during tornado watches. Practice shelter-in-place procedures.
Evacuation drills: Occasionally practice loading evacuation supplies and leaving home. Time the process and identify bottlenecks.
Communication drills: Practice communication protocols—can everyone reach out-of-area contacts? Do they remember reunion locations?
Make drills educational rather than scary for children, framing them as learning experiences.
Staying Current
Emergency preparedness evolves:
New threats: Stay informed about emerging threats in your area—new development changing flood patterns, increasing wildfire risk, changing weather patterns.
New technologies: Embrace new tools improving preparedness—better battery systems, improved communications, enhanced warning systems.
New family needs: As children age, parents age, and family circumstances change, adjust plans accordingly.
Conclusion: Preparedness Is Protection, Peace, and Power
Emergency preparedness represents one of the most important responsibilities of homeownership and family leadership. Natural disasters and emergencies will continue affecting communities nationwide—the question isn't if disasters will strike, but when and whether you'll be ready.
The investment in preparedness is modest—several hundred dollars for comprehensive supplies and a few hours for planning. The return on this investment is immeasurable: Your family's safety during disasters. Your home's protection from preventable damage. Your ability to recover quickly after emergencies. And perhaps most valuable, your peace of mind knowing you're ready for whatever comes.
Prepared families survive disasters that claim unprepared neighbors. They make better decisions under stress because they've thought through scenarios in advance. They experience less trauma because they feel some control over chaotic situations. They recover faster because they organized documents, understood insurance, and maintained financial reserves.
The steps outlined in this guide—assessing risks, creating communication plans, assembling emergency kits, protecting your home, planning evacuations, and maintaining preparedness—represent comprehensive protection for virtually any emergency you're likely to face. You now have the knowledge and frameworks to implement these protections.
What remains is action. Knowledge without implementation provides no protection. The time to prepare is now—before disasters strike, before urgency creates panic, before store shelves empty and evacuation routes clog.
Start today:
- Order a weather radio and emergency supplies
- Create your family communication plan
- Begin assembling your emergency kit
- Schedule a family meeting to discuss plans
- Take one photo of each room for your home inventory
- Review your insurance policies
- Identify your evacuation routes
- Secure your water heater to the wall
Each small step compounds into comprehensive protection. You don't need to complete everything today—but you need to start today. Set a goal of implementing one preparedness action weekly. Within a few months, you'll have comprehensive protection in place.
Disasters are unpredictable, but your response doesn't have to be. With planning, supplies, and practice, you can face emergencies with confidence rather than fear, with preparation rather than panic, with resilience rather than helplessness.
Your family depends on you to keep them safe. Your home represents likely the largest investment you'll ever make. Both deserve the protection that comprehensive emergency preparedness provides. The knowledge is now yours. The responsibility is yours. The decision to act is yours.
Make that decision today. Begin your preparedness journey now. When the next disaster strikes—and it will—you'll be ready. Your family will be safe. Your home will be protected. And you'll face whatever comes with the confidence that comes from genuine preparation.
Emergency preparedness: It's not about if, it's about when. And when that moment comes, you'll be ready.
Additional Reading
Check out more of our blog posts and the Money Viper podcast.